Walkthrough 6-5: Get and set event data using DataWeave expressions
In this walkthrough, you get and set event data using DataWeave expressions. You will:
· Use expressions to set the payload and a logged value.
· Use expressions to set a response header and a request query parameter.
· In expressions, reference values for the event payload and attributes.
· Use the DataWeave upper() function, the concatenation, as, and default operators.
Starting file
If you did not complete the previous walkthrough, you can get a starting file here. This file is also located in the solutions folder of the student files ZIP located in the Course Resources.
Use an expression to set the payload
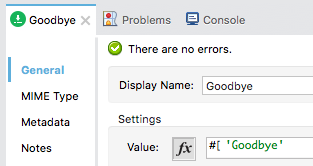
1. Return to apdev-examples.xml.
2. Navigate to the properties view for the Goodbye Set Payload transformer in goodbyeFlow.
3. Use expression mode to change the value to an expression.
#['Goodbye']
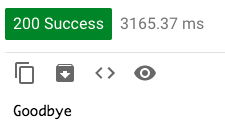
4. Run the project.
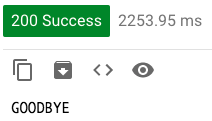
5. In Advanced REST Client, send the same request; you should get the same result of Goodbye as before.
Use a DataWeave function
6. In Anypoint Studio, return to the Goodbye Set Payload properties view.
7. Inside the brackets and before the string, type the word up and press Ctrl+Spacebar.
8. Ensure auto-completion inserts the upper function.
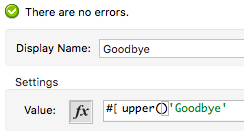
9. Move the Goodbye string into the parentheses.
#[upper('Goodbye')]
10. Save the file to redeploy the application.
11. In Advanced REST Client, send the same request; the return string should now be in upper case.
Use an expression that references the payload in a Logger
12. Return to Anypoint Studio.
13. Navigate to the properties view for the Logger in helloFlow.
14. Change the display name to payload.
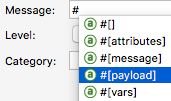
15. Type # in the message field and double-click #[payload] in the auto-completion menu.
16. Save the file to redeploy the application.
17. In Advanced REST Client, send the same request.
18. Return to the console in Anypoint Studio; you should see GOODBYE displayed for the second Logger instead of the entire event object.

Use a string literal and a DataWeave expression in a property value
19. Return to the properties view for the Logger in helloFlow.
20. Switch the message field to literal mode then change the value to display the string Message in front of the payload.
Message: #[payload]
21. Save the file to redeploy the application.
22. In Advanced REST Client, send the same request.
23. Return to the console in Anypoint Studio; you should see the new string displayed.

24. Return to the properties view for the Logger in helloFlow.
Use the DataWeave concatenation operator
25. Switch the message field to expression mode then change its value so the string is part of the evaluated expression and use the concatenation operator.
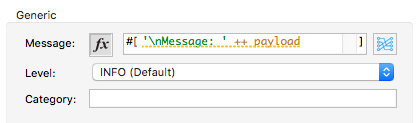
#['Message: ' ++ payload]
26. Add \n in front of the message to display it on a new line.
27. Save the file to redeploy the application.
28. In Advanced REST Client, send the same request.
29. Return to the console in Anypoint Studio; you should see the string displayed on a new line.

Use an expression that references an attribute in a Logger
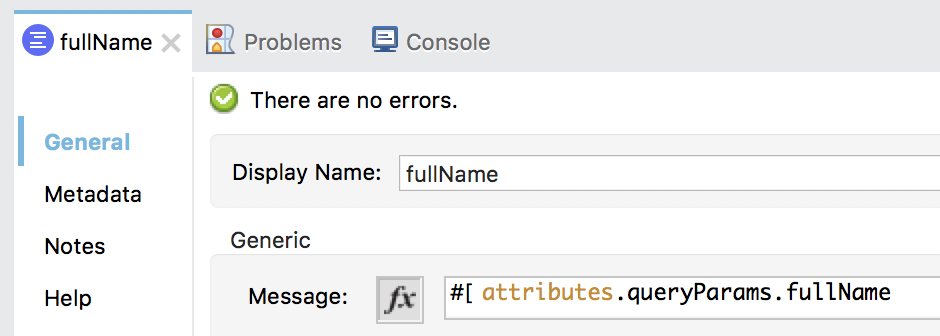
30. Return to the properties view for the Logger in goodbyeFlow.
31. Change the display name to fullName.
32. Switch the message field to expression mode then type the word at and press Ctrl+Spacebar; you should see auto-completion insert the attributes keyword.
33. At the end of attributes, add a period, type q and double-click queryParams in the auto-completion menu.
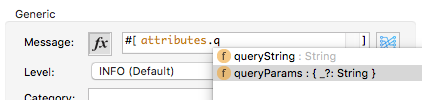
#[attributes.queryParams]
34. Click Apply Changes to redeploy the application.
35. In Advanced REST Client, send the same request.
36. Return to the Anypoint Studio console; you should see an object displayed by the first Logger.

37. Modify the message for the Logger in goodbyeFlow to display the value of the query parameter.
#[attributes.queryParams.fullName]
38. Click Apply Changes to redeploy the application.
39. In Advanced REST Client, send the same request.
40. Return to the console; you should now see the value of the parameter displayed.

Use an expression that references an attribute when setting the payload
41. Navigate to the properties view for the Goodbye Set Payload in goodbyeFlow.
42. Use the concatenation operator to also display the value of the query parameter separated by a space.
#[upper('Goodbye') ++ ' ' ++ attributes.queryParams.fullName]
43. Select the Problems tab and review the error.

Use the as operator to coerce the attribute to a String
44. Use the as operator to also display the value of the query parameter separated by a space.
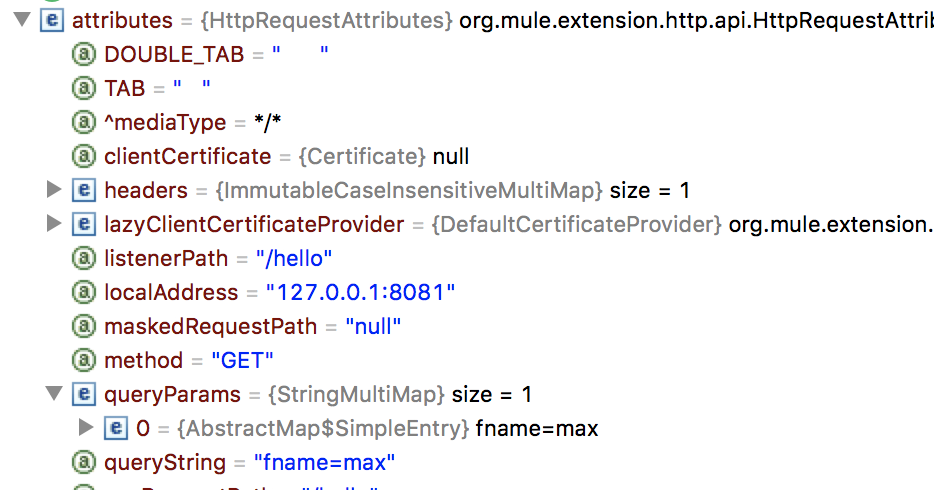
#[upper('Goodbye') ++ ' ' ++ attributes.queryParams.fullName as String]
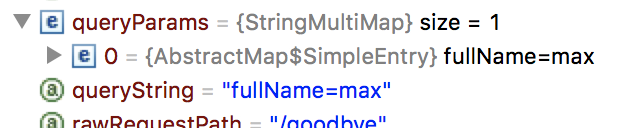
Note: This step coerces a null value to a String, to avoid UI errors. The recommended way to handle null values is by using a default value which is explained later in this walkthrough.
45. Click Apply Changes to redeploy the application.
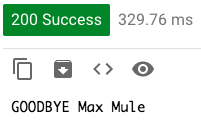
46. In Advanced REST Client, send the same request; you should now also see the name displayed.
Use an expression to set a request header
47. Return to the Anypoint Studio and navigate to the properties view for the GET /goodbye HTTP Request in helloFlow.
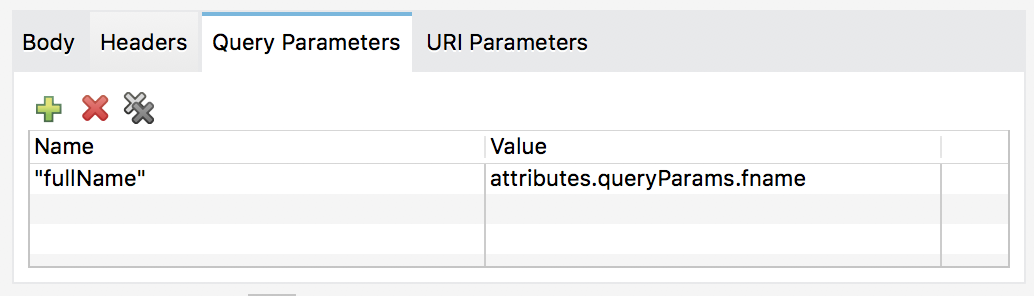
48. In the Request section, select the Query Parameters tab.
49. Change the value of fullName to the value of the fname query parameter.
50. Click Apply Changes to redeploy the application.
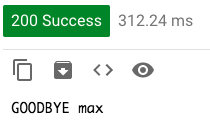
51. In Advanced REST Client, send the same request; you should now see the name of the fname query parameter displayed.
Make a request and do not send a query parameter
52. Remove the query parameters and make a request to http://localhost:8081/hello; you should get an error.

Set a default value in an expression
53. Return to the Anypoint Studio and navigate to the properties view for the Goodbye Set Payload in goodbyeFlow.
54. Remove as String.
55. Use the default operator to add a default value of Maxine.
#[upper('Goodbye') ++ ' ' ++ (attributes.queryParams.fullName default 'Maxine')]
56. Click Apply Changes to redeploy the application.
57. In Advanced REST Client, send the same request; you should now see the default value Maxine displayed.

Use a query parameter in the expression for a response header
58. Return to the Anypoint Studio and navigate to the properties view for the GET /hello HTTP Listener.
59. Select the Responses tab.
60. Change the name header value to the value of the fname query parameter.
attributes.queryParams.fname

61. Click Apply Changes to redeploy the application.
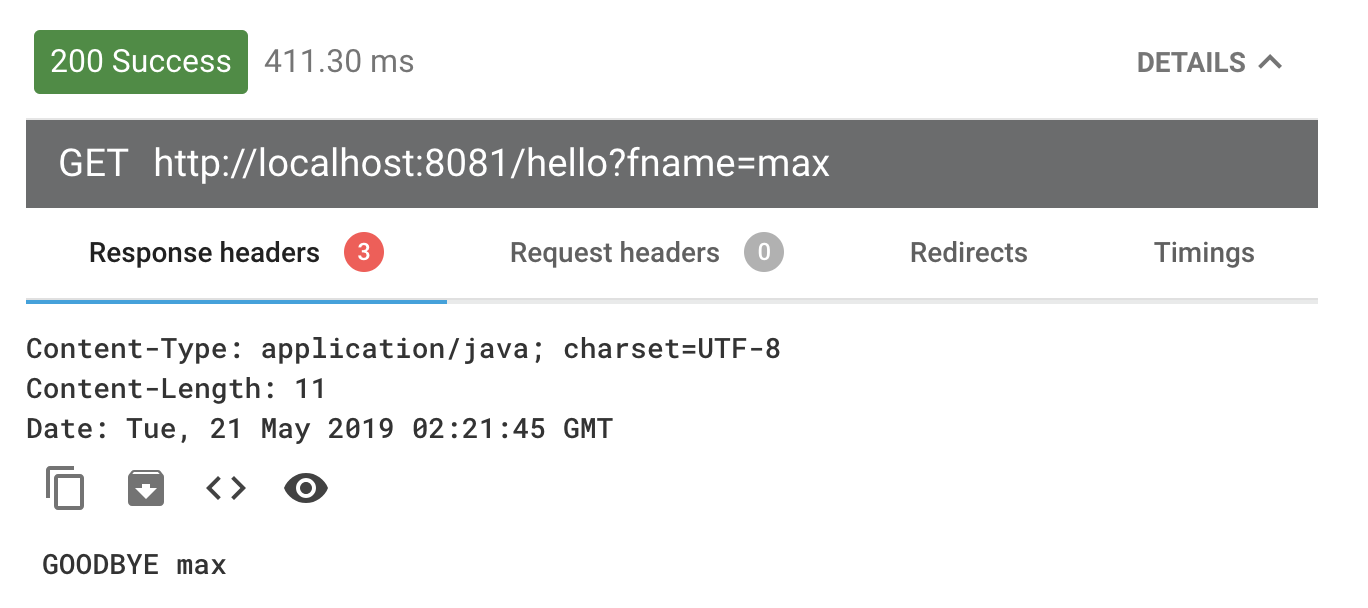
62. In Advanced REST Client, add an fname and set it equal to max or some other value and send the request.
63. Look at the response headers; you should no longer see a name header.
Debug and verify the query parameter is sent with the request
64. Return to Anypoint Studio.
65. Stop and then debug the project.
66. Return to Advanced REST Client and send the same request.
67. Return to the Mule Debugger and look at the attributes and query parameters; you should see the fname query parameter.
68. Step into goodbyeFlow and look at the attributes and query parameters; you should see the fullName query parameter.
69. Step back to helloFlow and look at the value of the attributes; you should not see any query parameters.
70. Step through the rest of the application.
71. Switch to the Mule Design perspective.